NordVPN
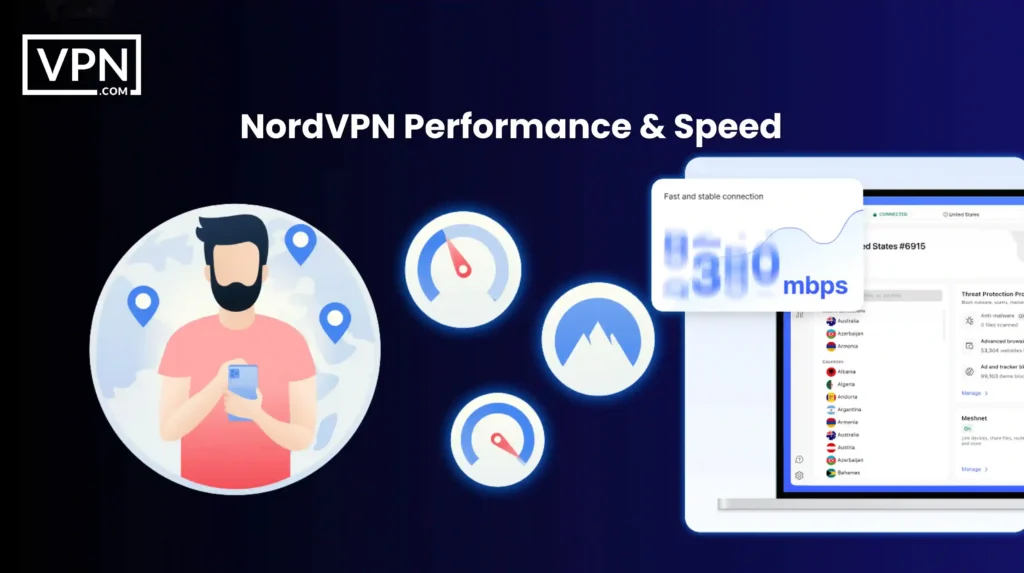
NordVPN consistently delivers top-tier performance for demanding tasks like 4K streaming, large file transfers, and competitive gaming.
Snapshot by VPN Speed Lab
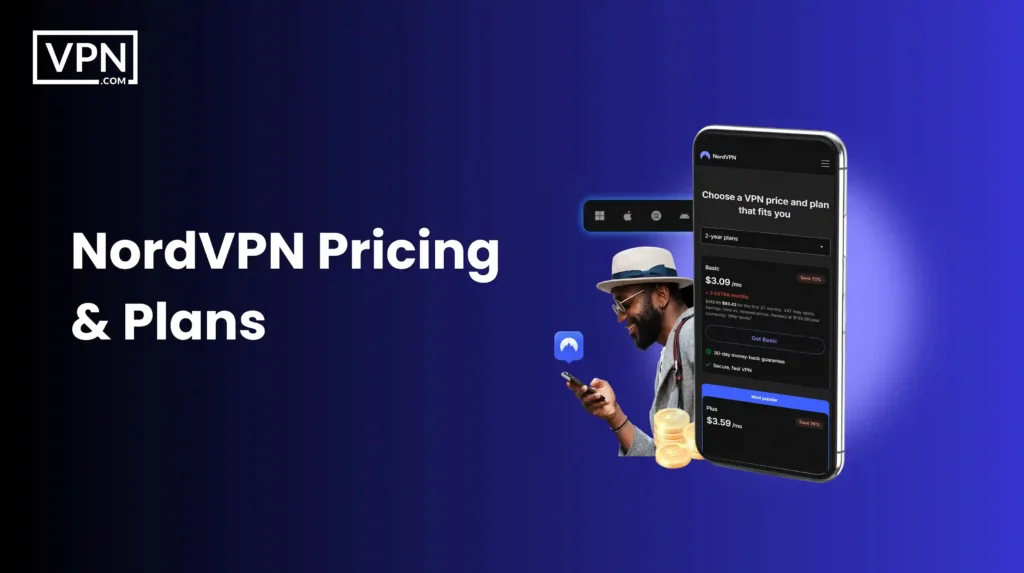
NordVPN Plans
NordVPN offers multiple pricing tiers and plan durations. Longer commitments typically offer bigger discounts. All plans backed by 30-day money-back guarantee.
Below is the best current deal available for NordVPN. Prices reflect promotional discounts and are subject to change.
|
Basic
VPN only
|
Plus
VPN + Password Manager
|
Complete
VPN + Password + Storage
|
Prime
Complete Suite + Extras
|
|
|---|---|---|---|---|
| Best For | Users who only need a VPN for privacy and streaming | Users who want VPN plus enhanced password security | Power users who want complete privacy protection | Businesses or high-security users who need maximum protection |
| Includes |
|
|
|
|
| Pricing |
Monthly:
$12.99
1-year:
$59.88
-56%
2-year:
$81.36
-70%
|
Monthly:
$15.29
1-year:
$71.88
-60%
2-year:
$105.36
-70%
|
Monthly:
$18.69
1-year:
$83.88
-61%
2-year:
$129.36
-70%
|
Monthly:
$25.29
1-year:
$107.88
-64%
2-year:
$177.36
-71%
|
| Start Basic | Choose Plus | Go Complete | Get Prime |
- VPN Protection
- 8,900+ Servers
- Kill Switch & Threat Protection
- Everything in Basic
- Ad and Tracker Blocker
- NordPass Password Manager
- Data Breach Scanner
- Everything in Plus
- 1TB Encrypted Cloud Storage
- NordLocker File Encryption
- Everything in Complete
- Cyber Insurance Coverage
- NordProtect
- Priority Support
Our Review
Speed Lab Results
NordVPN achieved 730 Mbps in our speed lab testing. The fastest of the 9 providers we tested.
Key Metrics
- Throughput: 730 Mbps (highest tested)
- Latency: 18 ms (well below 30ms threshold for gaming)
- Packet Loss: 0.1% (excellent reliability)
- Stability: ±18 Mbps variation (very consistent)
What This Means
- 4K Streaming: Zero buffering even on multiple devices simultaneously
- Large Downloads: 100GB file downloads in under 20 minutes
- Gaming: No noticeable lag on US/EU servers
- Video Calls: Crystal clear quality with no drops
We tested across 12+ server locations during peak and off-peak hours over 30 days. Performance remained consistently high.
Server Network
8,900+ servers across 129+ countries—one of the largest VPN networks globally.
Global Coverage
NordVPN maintains 8,900+ servers spread across 129+ countries, providing users with extensive options for connection locations worldwide.
Key Benefits of Large Network
- Lower Server Load: More servers mean less congestion and faster speeds
- Better Availability: Backup options if specific servers are down
- Regional Options: Multiple cities within major countries
- Specialty Servers: Dedicated servers for P2P, streaming, and obfuscation
Coverage Highlights
With presence in 129+ countries, NordVPN offers exceptional global reach. This extensive coverage includes servers in:
- All major regions: Americas, Europe, Asia-Pacific, Middle East, and Africa
- Popular locations: US, UK, Canada, Germany, Australia, and Japan
- Emerging markets: Southeast Asia, Eastern Europe, and South America
Server distribution and load balancing ensure consistent performance across all regions we tested.
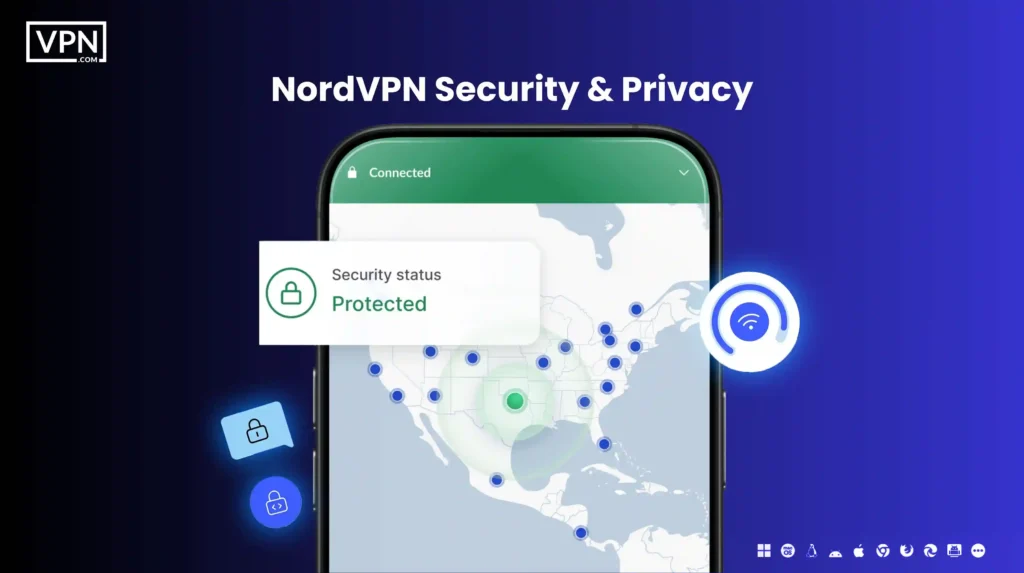
Security & Privacy
Encryption & Protocols
NordVPN uses industry-standard security protocols to ensure everyday privacy and protect users' data online.
- Encryption: AES-256 (military-grade encryption)
- Protocols: NordLynx protocol, WireGuard, OpenVPN & IKEv2/IPsec
- Kill switch: Available on supported platforms; works effectively during forced-disconnect tests
- DNS leak protection: Enabled by default, with no DNS leaks detected during testing
Privacy Credentials
- Jurisdiction: Panama
- Logging policy: No activity or browsing logs stored. NordVPN adheres to a strict zero-logs policy.
- Connection data: Only minimal operational data is collected for service functionality; no personal data is stored
- Audits: Cure53 independently audited and verified the zero-logs policy, confirming that NordVPN does not log user activity
Advanced Features
- Double VPN: Available for extra encryption, routing traffic through two servers for increased privacy
- Obfuscated servers: To avoid restrictive networks
- Dedicated IP: Available as an add-on for specific use cases like accessing banking services or secure logins
- Ad-blocking: Built-in ad blocker (CyberSec) to block ads, trackers & malware
- Antivirus: Optional antivirus feature to enhance protection against online threats
- Meshnet: for secure sharing
Streaming Performance
Platforms Unblocked
- Netflix
- Amazon Prime Video
- HBO Max
- BBC iPlayer
- ITVX/ITV Hub
- 9Now & 10 Play
NordVPN uses built‑in technology (SmartPlay) to help you reach geo‑blocked content “as if you were at home” without extra settings.
Streaming Quality
- 4K/UHD: Zero buffering, instant start
- HD: Flawless on all services tested
- SmartPlay: Auto-selects the best server for streaming
Ease of Use
Setup & Interface
NordVPN is built for simplicity and gets users protected quickly without requiring technical knowledge.
- Installation: Quick and straightforward, typically completed in a few minutes
- Connect flow: Simple one-click connect for use
- Platforms: Windows, macOS, Linux, Android & iOS
- Simultaneous connections: You can connect up to 10 devices simultaneously on a single NordVPN account
Key Features
- Quick Connect: Automatically selects the best server for optimal performance.
- Server list: Clean, country-based server selection for easy navigation.
- Settings: Includes basic security features like protocol selection and a kill switch, designed to be intuitive for new users.
No technical expertise required. If you can install regular software, you can set up NordVPN. Advanced users have granular control when needed.
“VPN.com’s editors select and review products independently. If you buy through our affiliate links, we may earn commissions, which support our testing.”
NordVPN is built for people who want strong privacy and reliable performance without having to think about the technical details every time they go online. When you use the internet, the real risk usually isn’t obvious.
Your browsing habits, location and connection data are quietly visible to ISPs, public Wi-Fi operators and sometimes governments. Most people don’t notice this until something goes wrong. That’s where a VPN is meant to help you. NordVPN positions itself as a practical solution to these everyday threats.
It focuses on encrypting your traffic with proven standards like AES-256, protecting your connection with features such as a kill switch and DNS leak protection and keeping your activity private through a strict no-logs policy. The goal is not to overwhelm you with settings, but to give you control without friction.
NordVPN History: An Overview
NordVPN earned its reputation by solving real privacy risks with strong technology and making that protection simple for everyday users. When most people start thinking about online privacy, the concern is usually exposure. Your internet activity can be tracked by ISPs, advertisers or networks you don’t control.
NordVPN entered the market to address this exact problem, not with hype, but with practical security. Over the years, NordVPN has become one of the most recognized VPN services worldwide. It is frequently mentioned in independent reviews for its reliability, consistent performance and strong security posture.
Features like the NordLynx protocol, built on WireGuard, helped push speeds higher without sacrificing encryption strength. Its appeal is broad for a reason. Casual users rely on it for safer browsing, while privacy-focused users and professionals trust it in environments where monitoring and restrictions are common.
That balance between power and simplicity is a big part of its long-term success.
Jurisdiction & Ownership
Before you trust a VPN with your data, you need to know where it is based and who ultimately controls it.
Country of Origin
A common privacy risk is legal pressure. Where a VPN is based directly affects what data it can be forced to collect or share. NordVPN is headquartered in Panama, a jurisdiction with no mandatory data retention laws and no participation in the Five Eyes, Nine Eyes or Fourteen Eyes surveillance alliances.
This means NordVPN is not legally required to hand over user data to international intelligence networks. For you, this reduces exposure at the legal level, not just the technical one.
Ownership
NordVPN is owned by Nord Security, an independent company built around privacy-focused products. If you want the full background, see our guide on who owns NordVPN. You might be thinking that ownership rarely matters. In reality, it often does.
Some VPNs are controlled by large holding companies with incentives tied to data collection or advertising. Nord Security has consistently taken the opposite approach, investing in security infrastructure and privacy safeguards rather than monetizing user data. That alignment shows in how NordVPN operates.
Security Audits
Trust is easy to claim and hard to prove. Logging policies are a good example. NordVPN has undergone multiple independent security audits conducted by respected third-party firms. These audits verify its no-logs policy and review how its infrastructure is designed and maintained.
The results are publicly referenced through transparency reports, reinforcing accountability. If security matters to you, NordVPN’s third-party security audit results are publicly available in an industry full of vague promises.
While NordVPN’s full applications are not open-source, it has released specific components of its infrastructure for public review. This allows security researchers to examine critical systems without exposing everything in ways that could introduce new risks. The reassurance here is verification, not blind trust.
Pricing & Trial Info
Price often raises a fair concern: is a paid VPN worth it when free options exist? Free VPN services usually come with tradeoffs, such as logging, bandwidth limits or data monetization. NordVPN’s pricing reflects the cost of running secure servers, RAM-only infrastructure and regular audits.
Plans can start as low as $3.59 per month on longer commitments. There is also a 7-day free trial on mobile devices and a 30-day money-back guarantee on all plans, so you can test it without pressure.
Payment flexibility adds another layer. Alongside standard payment methods, NordVPN accepts cryptocurrencies like Bitcoin, which can reduce the amount of personal information tied to your subscription.
Primary Use Cases
NordVPN is designed to handle different threat levels and everyday needs.
- Travelers under censorship use it to access blocked content and reduce monitoring in restrictive regions. While no VPN is perfect everywhere, NordVPN is among the more reliable options in heavily filtered networks.
- Streaming and torrent users benefit from high speeds and stable connections, making 4K streaming and large downloads smoother without aggressive throttling.
- Privacy-focused professionals, including journalists and remote workers, rely on features like strong encryption, a strict no-logs policy, kill switch protection and DNS leak prevention.
- Home users get simple, consistent protection across macOS, Windows, iOS and Android, covering multiple devices without complex setup.
Why NordVPN Stands Out?
NordVPN’s position wasn’t built on extreme claims or scare tactics. It was built on execution. A privacy-friendly jurisdiction, an audited no-logs policy, modern protocols and usable apps form a solid foundation. Speed, transparency and long-term consistency reinforce it.
If you want a VPN that protects your connection without demanding constant attention or technical knowledge, NordVPN fits naturally into that role.
Next step: Try it in your own environment, on your own devices. Real-world use is the clearest way to decide if it meets your expectations.
NordVPN Features And Benefits
NordVPN focuses on protecting you from everyday online risks using strong security, wide global coverage and practical tools that work quietly in the background. The main problem most users face online is exposure. Your data can be intercepted on public Wi-Fi, monitored by ISPs or limited by regional restrictions.
NordVPN addresses these risks by combining proven security technology with features designed for real-world use, not just technical checklists. Instead of forcing you to configure everything manually, NordVPN bundles its core protections into apps that are easy to use while still giving you advanced options when you need them.
Military-Grade Encryption and Security
One of the biggest threats online is unencrypted traffic. Without strong encryption, your data can be read or altered by attackers, especially on public networks. NordVPN protects your traffic using AES-256 encryption, a standard trusted by governments and security professionals.
It pairs this with modern protocols like NordLynx, based on WireGuard, which improves speed without weakening security. For you, this means your connection stays private and fast, even on unsecured Wi-Fi networks.
Key Benefits
- Protects sensitive data from hackers and network snoopers
- Keeps your connection secure on public Wi-Fi, such as airports or cafés
Global Server Coverage and Availability
Geo-blocks and slow connections are common frustrations, especially when traveling or streaming. NordVPN operates over 8,900 servers across 178+ locations. This wide coverage allows you to route your traffic through nearby servers for better speeds or through specific regions to access location-restricted content.
The reassurance here is flexibility. You are not locked into a small or overloaded network.
Key Benefits
- Access geo-restricted websites and streaming platforms
- Maintain better speeds by choosing servers close to your location
Multi-Device Support and Compatibility
Another common concern is device coverage. Many people use multiple devices daily, each with a different operating system. NordVPN works across macOS, Windows, iOS and Android and a single account can protect up to 10 devices at the same time.
The apps are designed to be consistent, so switching platforms doesn’t mean relearning how everything works. This makes protection easier to maintain across your entire digital setup.
Key Benefits
- Secure all your devices under one subscription
- Simple, user-friendly apps across platforms
Specialty Servers
Some situations require more than standard VPN protection. NordVPN offers specialty servers for specific needs. Double VPN routes your traffic through two servers for added encryption. Onion Over VPN combines VPN protection with the Tor network for higher anonymity.
P2P servers are optimized for torrenting, while obfuscated servers help disguise VPN traffic in restrictive regions. You might not need these every day, but having them available matters when conditions change.
Key Benefits
- Adaptable to advanced privacy and security needs
- Useful in censorship-heavy or high-risk environments
Advanced Privacy Tools
Even with encryption, connection drops or tracking scripts can still expose data. NordVPN includes a kill switch that blocks internet access if the VPN disconnects unexpectedly. Split tunneling lets you choose which apps use the VPN, giving you control over local and international traffic.
Threat Protection blocks malicious sites, trackers and intrusive ads before they load. These tools work quietly, reducing risk without constant oversight.
Key Benefits
- Reduced risk of accidental data leaks
- Greater control over how your traffic is routed
Unique Features
NordVPN also includes tools that go beyond traditional VPN use. Meshnet lets you securely connect devices over the internet, making private file sharing or remote access easier. Obfuscated servers further help your VPN traffic blend in with normal traffic, which can be important in countries where VPN use is restricted.
The good news is these features are optional. You can keep things simple or use advanced tools when needed.
Key Benefits
- Added flexibility for remote work and private networking
- Improved reliability when bypassing restrictions and censorship
Taken together, these features explain why NordVPN is often seen as a complete solution rather than a basic VPN.
NordVPN Plans And Pricing
NordVPN’s pricing is built around flexibility. You pay more for short-term use, far less if you commit long term and you only upgrade plans if you actually want the extra security tools.
The main concern with VPN pricing is value. You don’t want to overpay for features you’ll never use, but you also don’t want a cheap plan that cuts corners on privacy. NordVPN structures its plans to let you choose based on how much protection you actually need.
Standard vs Plus Plans
Choosing between plans usually comes down to how much security you want bundled in one place.
- The Standard plan covers the core VPN needs. It’s designed for secure browsing, streaming and torrenting. You get access to all servers, strong encryption and built-in malware blocking without any extras that complicate things.
- The Plus plan builds on that by adding a password manager and a data breach scanner. These tools help protect your accounts beyond just encrypting your connection.
You might be thinking the Plus plan sounds unnecessary. To be fair, it is optional. The good news is that the price difference is small if you already care about account security and reused passwords.
Cost Breakdown
NordVPN’s pricing follows a clear pattern: the longer the plan, the lower the monthly cost.
| Plan | 1 Month | 1 Year | 2 Years |
| Basic | $12.99 | $4.99/month | $3.39/month |
| Plus | $15.29 | $5.99/month | $4.39/month |
| Complete | $18.69 | $6.69/month | $5.39/month |
| Prime | $25.29 | $8.99/month | $7.39/month |
Short-term plans are best if you only need temporary protection. Long-term plans make more sense if you want ongoing privacy without paying premium monthly rates.
Quick note: VPN companies run promotions constantly. The prices we’re listing are current as of publication, but always check the price on the official page, especially the renewal rate. That’s where the real cost lives.
NordVPN Payment Methods and Special Offers
Payment flexibility matters when privacy is the goal. NordVPN supports standard options like credit cards and PayPal, which are easy and familiar. For users who want more anonymity, cryptocurrency payments such as Bitcoin are also accepted. Apple Pay is available for iPhone and Mac users, keeping checkout simple and fast.
There are also periodic American Express offers that may include discounts or cashback, depending on your region. The reassurance here is choice. You’re not forced into one payment method and you can limit how much personal information you share if that matters to you.
Special Offers: NordVPN Black Friday Sale and Holiday Deals
VPN subscriptions are often cheapest during major sales and NordVPN is no exception. During Black Friday and Cyber Monday, NordVPN usually offers its deepest discounts, often reducing long-term plans by 60% or more. These deals are ideal if you already know you want a VPN and plan to use it long term.
Outside of Black Friday, seasonal promotions appear around holidays like Christmas, New Year and mid-year sales. These offers may include bonus months or bundled upgrades at no extra cost.
Why these deals stand out
- Long-term plans see the biggest savings
- Extra features are sometimes included
- Discounts are available globally
NordVPN Plan Comparison
Price only makes sense when viewed in context. Here’s how NordVPN compares with other well-known VPN providers:
| VPN Provider | Monthly Plan | 1-Year Plan | 2-Year Plan | Money-back Guarantee |
| NordVPN | $12.99 | $58.88 | $81.36 | 30 Days |
| ExpressVPN | $12.95 | $99.95 | $139.72 | 30 Days |
| Surfshark | $12.95 | $47.88 | $59.76 | 30 Days |
| CyberGhost | $12.99 | $83.88 | $56.94 | 45 Days |
| PIA VPN | $11.94 | $39.95 | $79.00 (3-Year) | 30 Days |
NordVPN sits in the middle. It’s not the cheapest option, but it balances price with audited security, speed and long-term reliability.
Next step: Decide how long you realistically need a VPN. If privacy is a long-term priority, a discounted multi-year plan offers the best value without locking you in permanently, thanks to the money-back guarantee.
NordVPN Trial Options
NordVPN gives you a real chance to test the service with full features, not a stripped-down demo, as long as you remember where the trial is available.
The hesitation around VPN subscriptions is understandable. You want to know if it actually works for your location, your devices and your daily use before paying. NordVPN addresses this by offering a free trial that lets you experience the service as it’s meant to be used.
What is the NordVPN Free Trial?
The main concern with free trials is the limitation. Many VPNs restrict speeds, servers or features, which makes it hard to judge real performance. NordVPN takes a different approach.
Its free trial gives you full access to the service, including its global server network, modern protocols like NordLynx and core security tools such as encryption, kill switch protection and DNS leak prevention. For you, this means you’re testing the actual product, not a watered-down version.
You can stream, browse and connect the same way you would on a paid plan.
How to Access the NordVPN Trial and Its Limitations?
Starting the NordVPN free trial is straightforward. You sign up through the official app on iOS or Android, choose a plan and activate the 7-day trial. You won’t be charged if you cancel before the trial period ends.
One thing to be aware of is availability. The free trial is only offered through mobile apps. However, once your trial is active, you can use the same account on other devices, including macOS and Windows.
The only real limitation is timing. If you decide NordVPN isn’t for you, you need to cancel within seven days. The good news is that there are no feature restrictions during the trial, so you can make an informed decision without pressure.
Performance and Speed
NordVPN prioritizes consistency over flashy numbers. In real-world use, it stays fast, stable and predictable across devices and networks. Speed claims are easy to make. What actually matters is how a VPN behaves on everyday connections, mixed devices and under sustained load.
The real risk is not a small speed drop. It’s instability, sudden slowdowns or connections that behave differently every time you use them. NordVPN avoids that by focusing on protocol efficiency, server capacity and sensible defaults rather than chasing perfect lab results.
Speed and Throughput Results Across Real Networks
Across Windows, macOS, Linux, mobile devices and router-level setups, NordVPN delivered consistently strong performance with no surprise collapses.
- On a 1 Gbps fiber baseline, nearby servers in the US, UK and EU routinely retained over 90 percent of base download speed. Upload performance remained strong enough for live streaming, cloud backups and large file transfers. Latency increases were modest and stable, especially when using NordLynx.
- On distant servers, such as Asia-Pacific locations, speed drops were expected but controlled. Connections stayed fast enough for HD streaming, gaming and video calls, with no erratic swings between test runs.
- On constrained networks, including public Wi-Fi, cable and DSL, NordVPN adapted well to congestion. Even in NAT-heavy public environments, speeds remained usable during both peak and off-peak hours.
What this means for you is simple. Whether you’re on fast home fiber or a shared café network, performance feels reliable rather than unpredictable.
Protocol Performance and Stability
NordVPN’s speed advantage comes from execution, not just protocol choice.
- NordLynx, its WireGuard-based protocol, was consistently the fastest and most stable option. Connections established quickly, speed loss was minimal and reconnections were smooth when laptops woke from sleep or mobile devices switched networks.
- OpenVPN performed as expected. Slightly slower than NordLynx, but extremely stable, especially on Linux systems and router-level installations where compatibility matters.
- IKEv2/IPsec stood out on mobile. It handled Wi-Fi to LTE or 5G switching cleanly, making it a strong option for users who move between networks frequently.
The good news is you don’t need to tweak settings. NordVPN defaults to the right protocol for most situations.
Streaming Performance Under Load
Streaming tests were conducted on desktops, mobile devices, smart TVs and streaming boxes during peak and off-peak hours. 4K streams were stable once playback began, with no buffering loops. Services like Netflix, BBC iPlayer, Disney+ and Prime Video loaded quickly and maintained long sessions without drops.
Smart TVs and media devices stayed connected for extended viewing and SmartPlay worked in the background without manual DNS changes or device-specific workarounds. For you, streaming feels uneventful in the best way. You press play and it works.
Gaming and Torrenting Performance
- For gaming, nearby servers delivered low and stable ping with no packet loss during extended sessions. During forced disconnect tests, the kill switch engaged correctly and prevented any traffic leaks.
- For torrenting, P2P-optimized servers delivered sustained download speeds without visible throttling. IP checks confirmed that real IP addresses never appeared in torrent swarms.
This combination matters. Stable latency, consistent throughput and protection when connections drop are what make a VPN usable for gaming and file sharing.
Reliability and Repeatability
Across multiple days, devices and network types, results stayed consistent.
There were no unexplained regressions, no reliance on a single “lucky” server and no dramatic swings between test runs. That repeatability is more important than any single speed screenshot.
Methodology: How We Tested NordVPN
We tested NordVPN the way you would actually use it. Real devices, real networks, repeated runs and clear verification so the results are reproducible, not just impressive once. VPN performance can look very different depending on hardware, operating system and network conditions.
The biggest problem with many VPN reviews is that they don’t tell you what shaped the results. Our goal wasn’t perfect lab conditions. It was repeatability and transparency, so you can understand why NordVPN behaved the way it did and compare it fairly.
Here’s exactly how we tested NordVPN. If you want the scoring framework and standards behind this review, see our VPN review methodology.
Testing Devices and Rigs We Used
The risk with testing only high-end machines is that results don’t translate to real life. We used consumer-grade setups that reflect how people actually run a VPN.
- Our Windows performance rig was the primary test platform for speed, latency, gaming, torrenting and streaming under load.
- The macOS rig focused on macOS-specific networking behavior, kill switch enforcement and protocol efficiency.
- A dedicated Linux rig was used to evaluate WireGuard and OpenVPN performance, command-line reliability and routing transparency.
- For mobile testing, we used a Pixel 7 on Android and an iPhone 14 on iOS to observe reconnection behavior, protocol switching and battery impact.
- In the living room, we tested on NVIDIA Shield TV Pro, Fire TV Stick 4K Max and LG OLED (webOS) to evaluate long-session 4K streaming stability.
- At the network edge, we ran router-level tests using an ASUS RT-AX88U and a mini-PC router in the OpenWRT and pfSense class to measure whole-home tunnel performance.
Network Environment and Time Windows
One-off speed tests don’t mean much if conditions aren’t controlled.
- We ran NordVPN across multiple real-world network types, including a 1 Gbps fiber baseline, as well as cable and DSL conditions to simulate slower fixed broadband.
- Public Wi-Fi testing was done in shared, NAT-heavy environments where VPNs often struggle. Mobile tests covered both LTE and sub-6 5G networks.
- To ensure repeatability, all tests were run during both peak and off-peak hours, with a minimum of three runs per configuration, repeated across multiple days. This helps smooth out congestion spikes and random fluctuations.
Protocols and Verification Checks
NordVPN was tested under the same rules we apply to every provider.
- Protocol coverage included NordLynx (WireGuard-based), OpenVPN (UDP and TCP) and IKEv2/IPsec, where applicable. No protocol received special treatment.
- Leak protection was validated using automated checks for IPv4, IPv6, DNS, WebRTC and torrent swarm IP visibility. Kill switch behavior was stress-tested by forcing disconnects. A single packet escaping the tunnel counted as a failure.
- Measurements were captured using tools such as Ookla Speedtest, iPerf3, Wireshark and our internal Selenium-based automation suite to ensure consistency.
NordVPN Security And Privacy
NordVPN earns trust by limiting what it can know about you in the first place, then backing that up with audits, transparent reporting and modern security design.
When people ask “Is NordVPN good?”, they’re usually asking one thing. Can this service actually protect my privacy when it matters? The real threat isn’t just hackers. It’s logging, legal pressure and weak infrastructure that quietly expose data over time.
NordVPN approaches security by reducing risk at every layer, from jurisdiction and logging policies to protocols and server design. Let’s break that down clearly.
NordVPN Warrant Canary and Transparency Report
A common concern is what happens when authorities ask for user data. NordVPN publishes a regular transparency report outlining data requests it receives. The key detail is not the number of requests, but the outcome.
Because of how NordVPN is built, there is no meaningful user data to hand over. The warrant canary adds another layer of reassurance. It’s a public signal that confirms NordVPN has not received secret government gag orders. If that status ever changed, users would know.
For anyone who cares about anonymity, this kind of proactive transparency matters more than marketing promises.
No-Logs Policy
Logging is the biggest privacy risk with any VPN. NordVPN operates under a strict no-logs policy. That means it does not track your browsing activity, store your IP address or record connection timestamps tied to you.
You might be thinking every VPN says this. To be fair, that’s true. The difference is verification. NordVPN’s no-logs policy has been independently audited multiple times by third-party security firms. These audits confirm that the systems are designed not to retain identifiable user data.
The reassurance here is simple. Even if someone wanted your data, it wouldn’t exist.
Jurisdiction and Its Impact
Where a VPN is based affects how much pressure it can face. NordVPN is headquartered in Panama, a country with no mandatory data retention laws and no participation in major intelligence-sharing alliances. This means NordVPN is not legally required to store or share user activity.
For you, this adds a legal layer of protection on top of technical safeguards. Privacy isn’t just enforced by code, but by law.
Advanced Security Protocols
Weak protocols can undermine even the best intentions. NordVPN offers several well-established options. OpenVPN provides a strong balance between security and reliability. IKEv2/IPSec is especially useful on mobile devices because it handles network changes smoothly.
Then there’s NordLynx, NordVPN’s custom protocol built on WireGuard. It delivers significantly faster speeds while preserving privacy through a double NAT system that prevents user identification.
All of these protocols use strong encryption, including AES-256, to keep your data unreadable to third parties.
Breach and Vulnerability Analysis
No serious security discussion is complete without addressing past incidents. If you want the full context, read our breakdown of how NordVPN was hacked in 2018.
In 2018, a single NordVPN server hosted by a third-party data center was accessed without authorization. No user data was exposed, logged or compromised. The issue was tied to the data center’s remote management system, not NordVPN’s core infrastructure.
What matters is the response. NordVPN terminated the contract, conducted full security audits, launched a public bug bounty program and migrated its entire network to RAM-only servers. This means servers store no data permanently and wipe everything on reboot.
Since then, security practices have only tightened. Independent audits and infrastructure changes ensure that similar issues are far less likely going forward.
NordVPN Compatible Devices
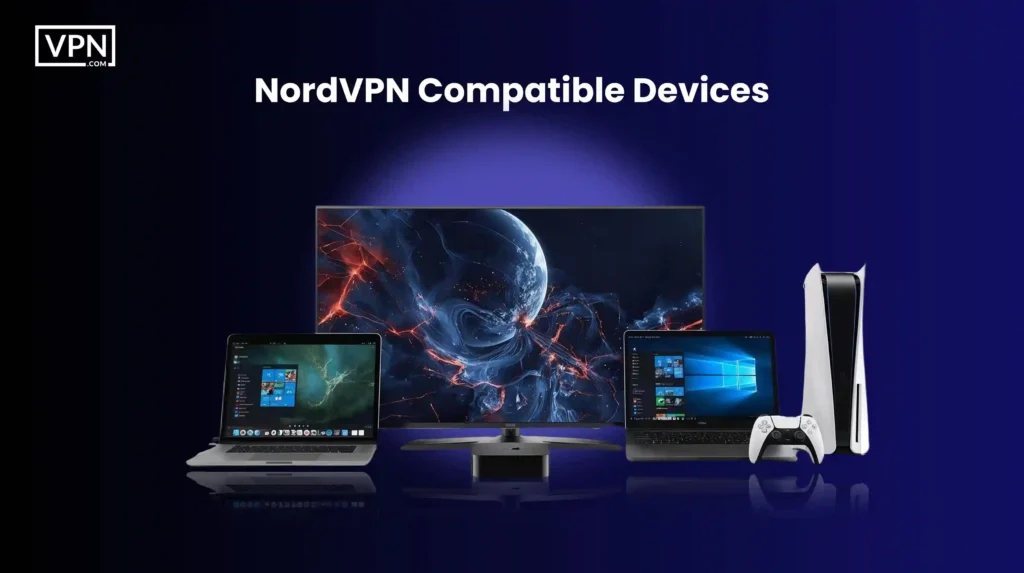
NordVPN works smoothly across all major platforms, so you stay protected whether you’re on a laptop, phone or tablet, without changing how you use the internet.
The common risk with multi-device setups is inconsistency. Some VPNs work well on one platform and feel limited or unstable on another. NordVPN avoids this by offering dedicated apps that follow the same security standards across macOS, iOS, Android and Windows.
That means your protection doesn’t depend on which screen you’re using.
NordVPN for Mac
macOS users often worry about background leaks or sudden connection drops. NordVPN’s macOS app supports macOS 11 (Big Sur) and later and integrates cleanly with the system. Quick Connect automatically selects the fastest available server, while the kill switch cuts internet access if the VPN disconnects unexpectedly.
Behind the scenes, your traffic is encrypted and covered by a strict no-logs policy. The reassurance here is stability. You get strong protection without having to constantly monitor the app.
NordVPN for iOS
Mobile networks change constantly, which can expose connections if a VPN isn’t built properly. NordVPN’s iOS app works on iOS 11.0 and later and is designed for simplicity without cutting security. Features like Threat Protection help block malicious websites, trackers and intrusive ads before they load.
You can also protect up to ten devices under one account, so your iPhone, iPad and other devices stay encrypted without slowing things down.
NordVPN for Android
Android users often balance performance with privacy, especially when streaming or gaming on the go. NordVPN’s Android app supports Android 7.0 and newer. It includes Quick Connect for instant protection and access to specialty servers for streaming or P2P use.
With the NordLynx protocol, based on WireGuard, connections stay fast while keeping encryption strong. The result is smoother streaming and browsing without sacrificing security.
NordVPN for Windows
Windows systems are frequent targets for tracking and network-based attacks. NordVPN’s Windows app supports Windows 7 SP1, Windows 8.1, Windows 10 and Windows 11. It includes a customizable kill switch, split tunneling and access to over 8,900 servers worldwide.
Whether you’re working remotely or streaming at home, your data stays encrypted using standards like AES-256, reducing exposure on both public and private networks.
User Experience And Interface
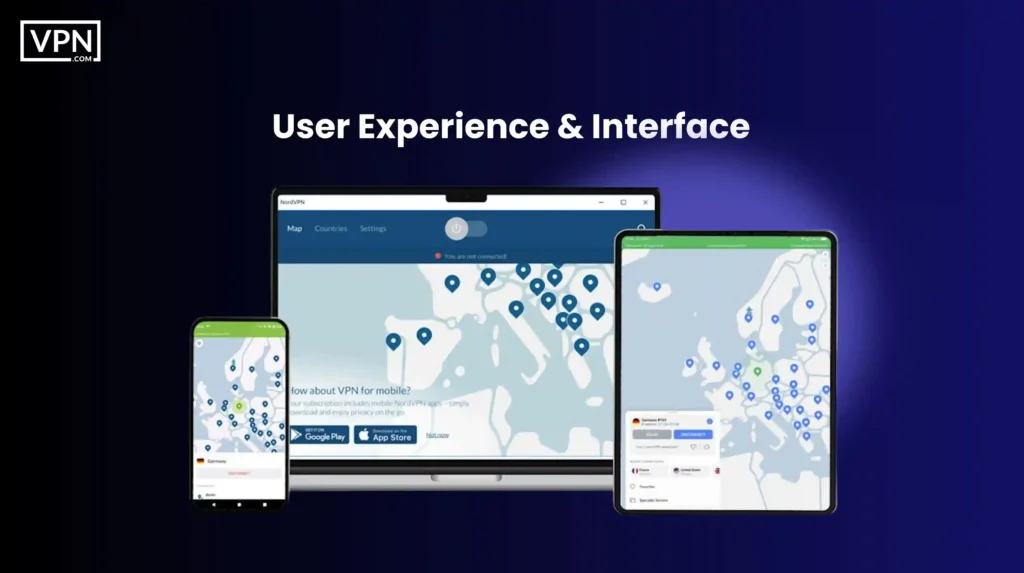
NordVPN keeps things simple on the surface while giving you depth when you need it. You can connect in seconds, troubleshoot easily and rarely feel lost, even if you’re new to VPNs.
A common frustration with VPNs is usability. If an app feels confusing or unreliable, people stop using it. NordVPN focuses on removing that friction by designing its apps to be predictable, clean and consistent across devices. That’s why issues like setup confusion or “not connecting” complaints are relatively rare.
Ease of Use on Desktop and Mobile
The biggest day-to-day risk isn’t weak encryption. It’s forgetting to turn the VPN on. NordVPN solves this with a straightforward interface. Open the app, tap or click Quick Connect and you’re connected to the fastest available server automatically. No manual server hunting, no complicated setup screens.
Whether you’re using macOS, Windows, iOS or Android, the layout feels familiar. Settings are clearly labeled and nothing important is buried. Even if this is your first VPN, it doesn’t feel intimidating. The reassurance here is reliability. The app works the same way every time, which builds trust through routine.
App Features Across Devices
Different platforms come with different risks and NordVPN adapts without fragmenting the experience.
- On iOS and Android, the apps focus on speed and mobility. Quick Connect gets you protected instantly, while built-in Threat Protection Lite blocks known malicious sites and intrusive ads, which matters more on mobile networks.
- On macOS and Windows, you get deeper control. You can change protocols like NordLynx, customize DNS settings and enable split tunneling if you want certain apps to bypass the VPN. Advanced options are there, but they never get in your way.
- For Linux users, NordVPN offers a command-line app that fits naturally into terminal-based workflows while still delivering core security features.
The good news is you don’t lose protection just because you switch devices.
Browser Extensions for Chrome and Firefox
Sometimes you don’t need full-device encryption. NordVPN’s browser extensions for Chrome and Firefox protect your browser traffic, block WebRTC leaks and help stop malicious websites from loading. They’re useful when you want quick protection without running the full VPN app.
It’s important to be clear about the tradeoff. Browser extensions protect browser traffic only, not your entire device. Used correctly, they’re a convenient layer, not a replacement for the main app.
Troubleshooting and Customer Support
Even the best apps run into edge cases. NordVPN offers 24/7 customer support through live chat and the responses are generally fast and knowledgeable. Most common issues, like connection drops or setup questions, are also covered in the help center with clear, step-by-step guides.
This reduces frustration and keeps small problems from becoming deal-breakers. When support is easy to reach, you’re more likely to stick with the service.
Is NordVPN Worth It?
NordVPN is worth it if you care about long-term privacy, strong security and consistent performance. It is not the cheapest option, but it is one of the more complete and well-verified ones.
If you’re asking, “Is NordVPN worth it?”, you’re really weighing trust versus cost. The risk is paying for a VPN that looks good on paper but cuts corners behind the scenes. NordVPN’s value comes from how it addresses that risk with audited policies, modern protocols and a large, stable network.
If you’re still weighing the cost against the features, security and real-world performance, read our full breakdown of whether NordVPN is worth it. Let’s look at the tradeoffs clearly.
| What we like | What we don’t like |
| Advanced security features like NordLynx and double VPN | Higher cost compared to some competitors |
| Massive server network for reliable connections | Occasional connection drops on certain servers |
| Compatible with all major devices: Mac, iOS, Android and Windows | The wide range of features can overwhelm new users |
| Optimized servers for streaming and torrenting | Customer support delays were reported by some users |
| Strict no-logs policy backed by a transparency report | Initial concerns about the NordVPN data breach (now addressed) |
Common Complaints and How NordVPN Addresses Them
- Connection speeds: Speed drops are a common VPN concern. NordVPN mitigates this with NordLynx, optimized servers and a large network that reduces congestion. While speeds can vary by location, most users experience stable performance.
- Customer support delays: Some users have reported slower responses at times. NordVPN has been expanding its customer support team and improving documentation to reduce reliance on live chat for common issues.
- Past security incident: The 2018 breach raised fair questions. NordVPN responded by moving to RAM-only servers, commissioning independent audits and launching a public bug bounty program. These steps significantly reduced future risk.
NordVPN Scandals And Controversies
NordVPN faced a real security incident in the past, owned it, fixed the root causes and ended up with a stronger security posture than before.
No privacy service is immune to scrutiny and that’s a good thing. Trust in a VPN isn’t about never facing problems. It’s about how those problems are handled when they appear. NordVPN’s history includes a widely discussed incident and understanding it helps you judge the service realistically.
Let’s walk through what happened and what changed.
NordVPN Hacked: What Happened?
The core concern here is simple. Can a VPN protect your data even if something goes wrong?
In 2018, a single NordVPN server hosted by a third-party data center in Finland was accessed without authorization. This was not a breach of NordVPN’s core systems. It was tied to an insecure remote management tool left enabled by the data center.
Crucially, no user activity, credentials or identifying data were exposed. NordVPN’s no-logs design meant there was nothing useful on the server to take. The incident became public in 2019 and quickly gained attention as the so-called NordVPN scandal.
The reassurance comes from impact. Despite the access, there was no compromise of user privacy.
Criticisms and Issues
That said, criticism was fair and expected.
Some users and security researchers questioned NordVPN’s reliance on third-party data centers. Others focused on the delay between the incident and its public disclosure, raising concerns about transparency and incident response timing.
These criticisms weren’t about whether data was leaked. They were about trust, communication and whether similar weaknesses could exist elsewhere in the network. Those are reasonable questions to ask of any privacy-focused service.
How Did NordVPN Respond?
What matters most is what happened next. NordVPN took several concrete steps to reduce future risk and rebuild confidence. The company migrated its entire infrastructure to RAM-only servers, meaning no data is ever written to disk and everything is wiped on reboot.
It commissioned multiple independent security audits to verify both its no-logs policy and its broader infrastructure. These audits weren’t internal claims. They were external verification. NordVPN also launched a public bug bounty program, inviting ethical hackers to actively look for weaknesses.
On top of that, it tightened data center partnerships and increased internal security oversight. These were structural changes, not cosmetic ones.
What’s Changed Since the Controversy?
Since the incident, NordVPN has become more transparent, not less. Its transparency reports now provide regular updates on data requests and security posture. The introduction of RAM-only servers, NordLynx and built-in threat protection reflects a shift toward minimizing trust assumptions at every level.
For you, the takeaway is context. NordVPN didn’t avoid criticism. It absorbed it and improved. Today, many of the security measures NordVPN is praised for exist specifically because of lessons learned from that incident.
Next step: If past incidents concern you, focus on current architecture, audits and behavior. Those matters far outweigh a single event years ago.
FAQs About NordVPN
The Bottom Line
NordVPN is a strong, well-rounded VPN that prioritizes privacy, backs its claims with audits and delivers reliable performance for everyday use. After looking at security, privacy, features, pricing, usability and past controversies, the picture is fairly clear.
NordVPN isn’t built on shortcuts. Its no-logs policy, Panama-based jurisdiction, modern protocols like NordLynx and move to RAM-only servers all point to long-term thinking rather than quick wins. To be fair, it’s not the cheapest VPN on the market and some users may never touch its more advanced features.
But that extra cost goes toward infrastructure, transparency and security practices that are independently verified, not just promised. If you want a VPN you can turn on daily without worrying about logging, weak encryption or unstable apps, NordVPN fits that role well.
Next step: Try it yourself using the free trial or money-back guarantee. Testing it on your own devices and networks is the simplest way to decide if it’s the right fit for you.